
A backsplash in the kitchen is the space between the cabinets and countertops on the wall. It is an essential element in the kitchen as it protects the wall from grease, water damage, oil damage, smoke, and stains. It also adds details to the aesthetic background of the kitchen. Creating your DIY kitchen backsplash is not just a fun project but saves you money, and although it is not the most uncomplicated labor, it is manageable through proper guidance and knowledge. Kitchen remodeling is in no shape or forms easy or hassle-free, but with appropriate guidance, even the most clueless can create their kitchen backsplash. The guidance from professional interior designers helps with the best form of remodeling and furnishing any room. Interior designers are best suited to advise you regarding remodeling issues and decor matters. And for those interested in joining interior design courses, join us at JD Institute of Fashion Technology, India’s number one institute of interior design and fashion design.
Here are all the materials required to create a kitchen backsplash. Start with buying backsplash tiles or granite or floor tiles for your kitchen. The patterns and style are up to you or what your interior designer deems fit for the kitchen. The tiles or your preferable washable substitutes can be the same as the rest of the kitchen or somewhat different so that it catches attention in the best way but doesn’t stick out like a sore thumb or looks out of place. Next, gather all the available materials required like pencils, measuring tapes, rulers, tile cutters, multipurpose adhesives, grout, notched trowel and plastic shapers. Keep these necessary materials handy.
Step 1- Clean the area. If there are residues of previously installed tiles or wallpaper in that area, take those out to prepare the blank canvas for your work on the wall space.
Step 2- Adjust the tiles to fit. Measure the area that you are planning to put your tiles on. Take all your measuring equipment and jolt down the area measurements. Use the tile cutters to cut out the shape and size required. Arrange the necessary sizes and adjust to fit in the kitchen outlets and electrical sockets, if any.
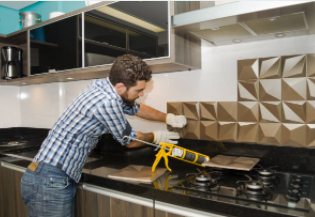
Step 3- Install the tiles. First off, prepare the round of work by applying adhesives on the wall using notched trowels and following proper guidance of a reliable youtube video guidance or by experts. And then, smoothly place your tiles to fit perfectly and make sure that the grip is firm; otherwise, use more adhesives till you are assured it won’t fall off. In cases of uneven gaps, use a plastic shaper to line your tiles properly.
Step 4- Use the grout to finish off your tiling. After at least 24 hours, apply the grout on the tiles. Clean the tiles with a damp sponge to make sure that the tiles are clean. Mix the grout to achieve a perfect consistency that is mentioned on the package or by the manufacturer. And then, apply the layer of grout safely within the tiles and make sure it does not get on the countertop. Ensure that the grout mixture is just enough to use within the next 20 minutes as the grout dries faster. Use a wrung-out damp cloth or sponge to clean the dried grout after about 10 minutes of applying the mixture. Use a commercial releasing agent to clean off the haze on the tiles from grout after it has dried.
As substitutes for the above mentioned most popular tiling method of the kitchen backsplash, here are three other ways of creating a fancy and attractive kitchen backsplash and some more interesting DIY kitchen backsplash ideas-
Stick on vinyl on tiles- These durable vinyl with adhesives are trendy as they are easy to apply and are aesthetically gorgeous. You can attach them to the tiles on the kitchen backsplash.
Beadboard backsplash- These are not only readily available but are non-expensive as well. These are very light thus can be attached easily to the area using adhesives.
Faux tiles with adhesives- These peel and stick tiles like wallpapers are easily applicable. They come in various patterns and exclude the messy labour of installing tiles on the kitchen backsplash.
JD Institute of Fashion Technology is India’s number one institute of fashion and design studies. JD Institute of Fashion Technology has also received international praise and recognition as one of Asia’s leading fashion and design study institutes. With excellent advanced education provided by top leading experts in interior design, we aim to train our students in their skills and help them create their place in the vast interior design industry growth over the past decades. Join us for interior design courses in B.Sc in interior design, B.A or B.Des in interior design, masters degree courses, other postgraduate degree courses and diploma courses. Alongside our regulated and advanced academic stimulation for our students, we offer them proper and regular workshop facilities and chances to explore their field of choice internationally.
Copyright © 2020 JD Institute of Fashion. All Right Reserved
Designed by